Type of House - Model for School Project - Red Indian Tipi/Tipee/Teepee

My second grader has to submit a project on type of house, where in they were asked to make a model of any one type of house.

I felt that hut, brick house and igloo is something very common. Most kids will make that. So we decided to make a Native Red Indian Tipi.

We used Drawing sheets to make a Tipi, two native red Indians, a Totem and a bon-fire. Some ready made felt flowers and horses were used to decorate the project.

visit this blog for a sample cutout shape of Tipi.

http://www.thatartistwoman.org/2009/07/how-to-make-mini-teepees.html

Here is our finalized model. We used old thermacol from AC box for the base. and rest of the things were erected on thermacol using toothpicks.

This time I forgot to take step wise pictures ..but from next time I plan to upload a details tutorial kind of blog to help other parents.


Ganpati from Quilling

One more year of Ganpati Festival , and here comes a new assignment. Make Ganpati idol without using clay or plaster of paris.

So we decided to do it with our favourite medium paper quilling.

With a little research on net to get an idea of how to go about it, we made this.

Use 1/2 cm quilling strips and 1" strips. Some embellishments and a small piece of cloth for dupatta.

And Voila !!

Final outcome .. my elder one was really pleased with it.


Beutiful isn't it... this has now become a permanent fixture of my art display wall  at home.

My take on using shape lacing kit

My friend asked me to suggest some toy for her 3 year old to keep her engaged during their flight to US.

She said I don't want to carry to many toys, give me something that can be used in many creative ways.

For my kids, I always use to carry a small bag full of small plastic animals and bird, a soft toy and a set of pencils, erasers, colors and papers, a set of match play cards etc. So I always had a bag full of toys and other stuff just for keeping my kids occupied during the flight.

When I saw this lacing kit while searching options for my friend, I just felt why I never searched market for such supplies when my kids were toddlers. It can be used to create so many activities.


Here is what I am talking about 


Looks plain simple lacing kits, isn't it.

All you can do is run a lace the through the holes in shape and work on your motor skills.


or loop a set of shapes through single lace.


There is more my dear friends. And here come the photo listing......

Mikado with Little Ones


Play with Numbers

One little two little three little toys

four little five little six little toys

.....

Play sorting game 

1) Start with color sorting. Stack same color toys in one group.


2) Next come shape sorting. Pick similar shapes objects and keep them together.


3)  Segregate Animals, Fruits into two groups.{if you are lucky you might get one more category "vehicles" in your pack, we did not get that)


Concept of More and Less: 

Arrange red color shapes in one row, yellow in second and green in third and so on.


Questions for kid

Which color row has more shapes?

Which color has less?

How do you decide what is more what is less?


Now ask your child to arrange these in a order so that colors that have less shapes are on top and color that have most shapes is at bottom of pyramid.

Here in a simple way we are introducing ascending and descending order .

Remove few shapes from the bottom row so that it has least shape.

Ask your kid to rearrange it.

Even a  simple toy can be used to learn several concepts.


Stencil for drawing:

Pick a shape and draw an outline with pencil or sketch pen. Let your child follow this method to trace all objects. They will not trace the perfect shapes. You need to appreciate their effort all the time, that's how you inculcate learning and a habit of trying out things.


Always remind yourself of the age difference between you and your little one. He/she can not demonstrate  your level of dexterity. It took you so many years to draw that perfect circle... allow your child time to master a skill before expecting perfection.


What is heavy and light?

Take two laces, in one put at-least 7-8 shapes and in second put 2-4 shapes. Tie the two ends of laces to make a garland of shapes.

Let your child pick one garland and then the other one by one.

Ask if he/she finds any difference while picking up the garlands.

Now let them pick both together in two hands and ask them to compare what they feel.


Paper Crumpling and texture drawing

holiday activities at home


Semicircle paper craft

My younger one got an assignment to make some designs using semicircular shapes cut out of paper... and we made a scenery


And this was her own creation a ladybug and an umbrella


Another year and a new Festival Craft

This time it was Pooja Thali. So we used Red velvet paper, Some glitter tape and gemstones stickers for decorating the thali. My daughter was given only one day notice by art teacher for making this .. so we decided to use papers and sticker to get this quick decoration ready.

The gemstone sticker speed-ed the work, otherwise it would have become a heavy duty task sticking one stone at a time.

Here is how it turned out ...


DIY Foam Vehiclaes

Today we decided to make some working models (not exact replicas) of vehicles.

First we collected things we might need to do this.

Here is our set of supplies :


6 mm foam sheets,  straw pipe, wooden sticks, some buttons for wheels. Some colorful paper for decorating the vehicles.

We started with making a red bus. 
Step by step picture tutorial.

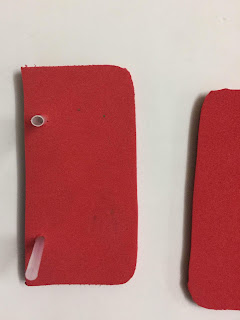
1) Make small holes using straw on the foam sheet where you want to put the wheels.


2)  Next cut small 2" pieces from straw and pass it through the two layers of foam sheet.


3) Next we added some window and doors on the body of bus. I printed stickers for this, so that it is easier     for my daughter to stick it on bus.

    The focus of this exercise was not pasting and sticking, but making a demo vehicle.


4) Next we put the wooden sticks through the straw. And put two buttons on each side.
This is how the assembly looked like.


6. Later we realized that buttons did not prove to be good as wheels. So we replaced it with  wheels made from  circular foam pieces. 

We tried several variation, by putting uneven sized wheels on either sides and analyzing  how the bus moves under various scenarios.


We also made a Jeep, a car, a Train model and a boat with the same supplies.


Inside Atom - Fun Hands On Activity


Atomic structure is a fairly simple concepts to understand and remember, if explained properly.

But kids do tend to get confused about various orbits, constituents of nucleus , naming conventions, electron in a particular orbit etc.

My challenge today was to design an activity for Atomic Structure concepts.

I decided to make concentric rings out of foam sheets to represent the orbits.

And Boards pins to represent neutron, proton and electron. Some paper tape was used for labeling purpose.

We started with arranging the orbits around nucleus.


Once the basic frame was ready.

Next we put label for "Nucleus" and orbits "K", "L", "M".

(Kids understand that "K" is first orbit , "L" second , "M" third and so on)


We decided to represent Oxygen atom in this.

Oxygen has atomic number 8.  So number of electrons, protons will be 8. Oxygen has equal number of neutron so that is also 8.


We picked white boards for neutron and  blue boards for proton. Green ones were used as electron.


Oxygen model was ready in few minutes. 


Later we made lots of atomic model of various elements. What a fun filled learning session we had...

Am I please with myself ... you bet I am. Nothing is more rewarding than a happy child who is enjoying learning new concepts.

Try it with your kids and let me know their reactions.


Card Making Workshop

Posting some images from my card making workshop for 5-7 years old.

The idea was to give kids all the material and let them have fun desiging the cards.

There are lot of beautiful cards so uploading all pics will take some time.


(for some weird reason all images are appearing inverted ... thv tried lots of picture rotate options, nothing is working :(   )

Clock for Maths Lesson

My first grader had to make a clock as part of classroom activity for lesson "How to read and tell time".

I gave her a square birthday paper plate with Winne the Pooh print, some number stickers and two ice-cream stick cut into the shape of clock hand.

Here is what she made in her class


Festival theme workshop for kids

Just finished with a workshop for kids, we made lots of festival craft.

To start with we made Rakhi and my students did put together some beautiful designs. Here are few snaps.


Material used are satin ribbon, flower base for Rakhi, Satin ribbon rose, sequins, ready made leaves.

Notebook covers

My younger one who is in first grade has to submit her notebooks for final review. And she needed to make decorative covers for 3 subjects - maths, English and EVS.

Once again we used classic card stock paper from Riverside . We made it look like book binding. Used the blue, mauve and cream colour paper for front and back side of three books and black card stock was used to give it the book binding look.

For EVS we used animal clipart and transport clipart, as these are the two chapter she studied recently.


For maths front page we put cutting from old maths books on the cover page and a join the dots puzzle on the back cover.


For English we picked up her old alphabet book and pasted picture cutting from same on the front cover and two pictures for sentence making exercise.


and finally the notebooks looked like this... my daughter was very pleased