Today we decided to make some working models (not exact replicas) of vehicles.
First we collected things we might need to do this.
Here is our set of supplies :
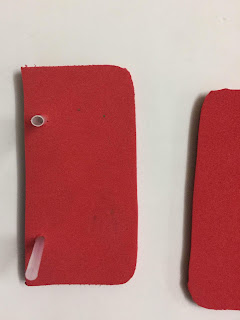
1) Make small holes using straw on the foam sheet where you want to put the wheels.
2) Next cut small 2" pieces from straw and pass it through the two layers of foam sheet.
4) Next we put the wooden sticks through the straw. And put two buttons on each side.
This is how the assembly looked like.
First we collected things we might need to do this.
Here is our set of supplies :
6 mm foam sheets, straw pipe, wooden sticks, some buttons for wheels. Some colorful paper for decorating the vehicles.
We started with making a red bus.
Step by step picture tutorial.
3) Next we added some window and doors on the body of bus. I printed stickers for this, so that it is easier for my daughter to stick it on bus.
The focus of this exercise was not pasting and sticking, but making a demo vehicle.
4) Next we put the wooden sticks through the straw. And put two buttons on each side.
This is how the assembly looked like.
6. Later we realized that buttons did not prove to be good as wheels. So we replaced it with wheels made from circular foam pieces.
We tried several variation, by putting uneven sized wheels on either sides and analyzing how the bus moves under various scenarios.
We also made a Jeep, a car, a Train model and a boat with the same supplies.


